Who doesn’t love a rich, savory, and silky gravy poured over mashed potatoes, roast beef, or even fries? Honestly, brown gravy homemade just hits differently—it’s like comfort food’s best-kept secret. Whether you’re hosting a family dinner or whipping up a quick weeknight meal, a homemade brown gravy can turn a simple dish into something unforgettable. Moreover, making your own gravy allows you to control the flavor, reduce unnecessary additives, and, you know, flex your cooking skills just a bit.
Ready to master this kitchen essential? Let’s dive into the background and origins of this culinary classic.
History and Origin
Gravy might seem like a humble sauce, but its roots are steeped in culinary tradition. Originally, it emerged as a way for cooks to make use of pan drippings—those flavorful bits left behind after roasting meats. Brown gravy specifically owes its popularity to European cuisines, particularly French and English cooking. The French, with their love for sauces, mastered the technique of creating a roux—a cooked mixture of butter and flour—as the base for a rich, luscious sauce.
By the time gravy crossed the Atlantic, it had evolved into an American dinner staple. Think Thanksgiving tables, Sunday roasts, or even diner-style Salisbury steak—gravy ties it all together. Interestingly, each culture adds its unique twist. In the South, brown gravy often carries a hint of spice, while Midwestern recipes may lean on beef stock for a heartier flavor.
What makes this sauce so special? Its adaptability! Whether you’re using it as a topping, dipping sauce, or even a base for stews, brown gravy transforms ordinary dishes into something extraordinary. Speaking of versatile kitchen staples, this resource from BBC Good Food dives into other recipes that complement brown gravy beautifully.
Ingredients and Equipment

Ingredients
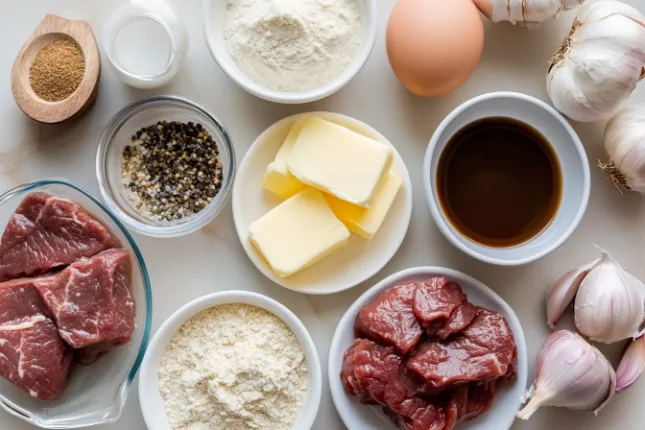
Here’s everything you’ll need to whip up a batch of delicious brown gravy homemade. Don’t worry—substitutions are your best friend if you’re missing something!
| Ingredient | Quantity | Substitutions/Notes |
|---|---|---|
| Butter | 4 tbsp | Margarine or plant-based butter for a vegan option |
| All-purpose flour | 4 tbsp | Cornstarch (use half the amount and mix with cold water first) |
| Beef stock | 2 cups | Chicken stock or vegetable broth for different flavors |
| Salt and pepper | To taste | Adjust based on the saltiness of your stock |
| Worcestershire sauce | 1 tsp | Soy sauce for a similar umami punch |
| Onion powder (optional) | ½ tsp | Skip or replace with garlic powder for a twist |
Equipment
You don’t need fancy gadgets—just the basics:
- A medium saucepan
- Whisk (trust me, you’ll need it for a lump-free texture)
- Measuring cups and spoons
- Ladle for serving
For more ingredient tips and equipment essentials, check out Serious Eats’ guide to mastering the basics.
Step-by-Step Recipe for Brown Gravy Homemade

Making brown gravy homemade might sound like a challenge, but it’s simpler than you think. With just a few pantry staples and a little patience, you can create a silky, rich gravy that’s perfect for almost any meal. Ready to roll up your sleeves? Let’s get cooking!
Preparing the Roux
The roux is the backbone of any great gravy—it’s what thickens the sauce and gives it that signature velvety texture.
- Start with the butter.
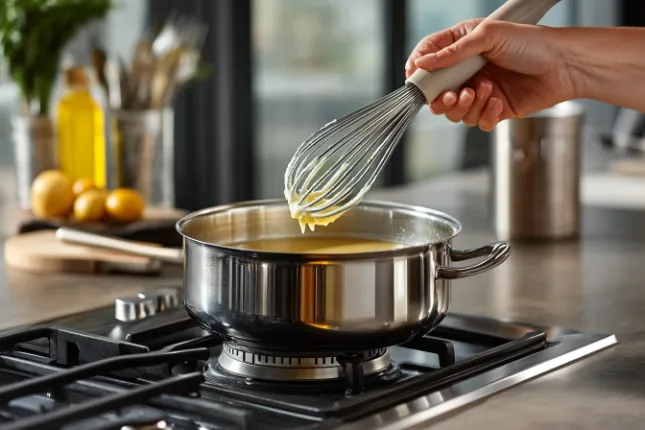
Place a medium saucepan over medium heat and add 4 tablespoons of butter. Let it melt completely, swirling it occasionally to prevent burning. - Next, add the flour.
Once the butter is fully melted, sprinkle in 4 tablespoons of all-purpose flour. Here’s the trick: whisk constantly. This keeps lumps from forming and ensures your roux is smooth. Keep whisking for about 3–4 minutes until the mixture turns a light golden brown. That color? It’s where the flavor magic starts! - Keep an eye on the heat.
Too high, and you’ll burn the roux. Too low, and it won’t brown properly. Medium heat is your best bet.
Helpful Tip: If you want a deeper flavor, cook the roux a little longer until it’s a darker golden hue. But be careful—it can go from perfect to burnt in seconds.
Adding Liquid and Achieving the Perfect Consistency
Here’s where the real transformation begins. Adding the liquid turns your roux into a luscious gravy.
- Slowly pour in the stock.
Gradually add 2 cups of beef stock to the roux while whisking continuously. Start with a small splash to loosen the roux, then pour in the rest in a steady stream. This prevents clumps and ensures a smooth texture. - Next, season it up.
Add a pinch of salt and freshly ground black pepper to taste. If you’re feeling adventurous, sprinkle in some onion powder or garlic powder for extra depth. - Simmer and thicken.
Bring the mixture to a gentle simmer. You’ll notice it starting to thicken—don’t rush this step! Let it cook for 5–7 minutes, whisking occasionally. This allows the flavors to meld beautifully. - Adjust the consistency.
If your gravy is too thick, add a splash of water or stock to thin it out. Too thin? Mix a teaspoon of cornstarch with a tablespoon of cold water, then whisk it into the gravy.
Pro Tip: For a glossy finish, stir in a teaspoon of Worcestershire sauce at the very end. It adds a subtle umami kick that takes your brown gravy homemade to the next level.
Flavor Enhancements
You’ve got your base, but why stop there? Let’s jazz things up a bit.
- Use pan drippings.
If you’ve just roasted a chicken, turkey, or beef, don’t let those drippings go to waste! Pour them into your gravy for a rich, meaty boost. - Add a splash of wine or soy sauce.
Red wine or soy sauce can deepen the flavor profile, but use them sparingly—they’re strong! - Experiment with herbs.
Toss in a sprig of thyme, a bay leaf, or a pinch of rosemary while the gravy simmers. Remove them before serving for a subtle herbal note.
Did You Know? Adding a dollop of cream at the end creates a richer, creamier version of your gravy. It’s like a little secret weapon for when you want to impress.
Troubleshooting Common Problems
Even the best cooks hit a snag sometimes. Here’s how to tackle common gravy hiccups:
- Lumpy gravy?
No problem! Just strain it through a fine-mesh sieve, and voilà—silky smooth perfection. - Too salty?
Add a splash of cream or a small peeled potato to the gravy. Let it simmer for a few minutes to absorb some of the saltiness. - Bland taste?
Stir in a teaspoon of soy sauce or a pinch of bouillon powder to pack in some flavor.
Pro Tip: Keep tasting as you go. It’s the best way to catch any issues early.
Serving Suggestions
Now that your brown gravy homemade is ready, how do you use it? The possibilities are endless!
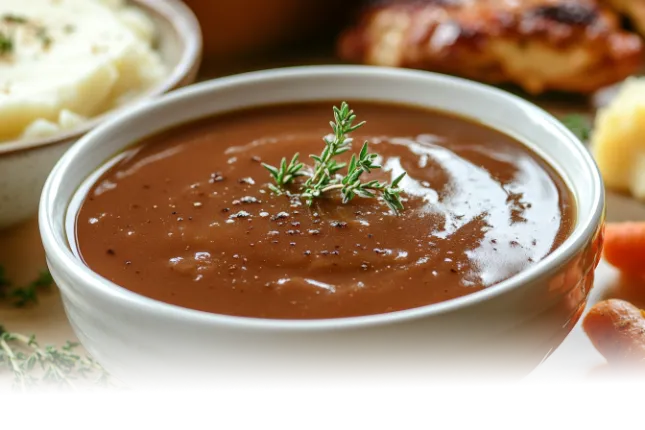
- Pour it over mashed potatoes for the ultimate comfort food combo.
- Drizzle it on roasted meats like chicken or beef.
- Use it as a dipping sauce for fries (trust me, it’s a game-changer).
- Make it the star of your next Shepherd’s pie.
For more comfort food ideas, check out our Easy Crockpot Marry Me Chicken recipe—perfectly paired with homemade gravy.
This step-by-step guide makes it clear: mastering brown gravy isn’t rocket science. It’s about simple techniques, quality ingredients, and a bit of love in the kitchen. So, what are you waiting for? Grab a whisk and get started!
Variations of Brown Gravy Homemade
Brown gravy is versatile enough to suit nearly every palate and dietary need. Whether you’re looking for a plant-based option or a twist inspired by international cuisine, there’s a variation for everyone. Let’s explore how you can adapt this classic recipe.
Vegetarian and Vegan Brown Gravy
- Ditch the butter and stock.
Replace butter with a plant-based alternative and use vegetable stock instead of beef or chicken stock. Coconut oil also works for a subtle flavor twist. - Amp up the umami.
Add a teaspoon of soy sauce or miso paste to recreate the depth of flavor that meat-based stocks provide. - Thicken without flour.
If you’re avoiding gluten, opt for cornstarch or arrowroot powder as your thickener. Mix with cold water before adding to prevent clumping.
Gluten-Free Brown Gravy
- Switch the thickener.
Cornstarch or potato starch works wonders in place of flour. Just remember to dissolve it in a bit of cold water first for lump-free gravy. - Mind your stock.
Some pre-made stocks or bouillon cubes may contain gluten, so check the labels carefully.
Pro Tip: A splash of cream can make gluten-free gravy just as luxurious as the original.
International Twists on Brown Gravy
- French-Inspired Demi-Glace:
Add a splash of red wine and reduce the gravy until it’s thick and glossy. Finish with a pat of cold butter for extra richness. - Asian-Style Brown Sauce:
Mix in soy sauce, a dash of sesame oil, and minced garlic. For a spicy kick, a pinch of chili flakes works beautifully. - British Onion Gravy:
Sauté sliced onions until caramelized, then add them to your brown gravy for a hearty, rustic twist.
Common Challenges and Fixes
Even seasoned cooks face hiccups with brown gravy homemade. Here’s how to tackle the most common issues:
Lumpy Gravy? Fix It in Seconds
- Strain it out.
Pour the gravy through a fine-mesh strainer to remove lumps. It’s quick and easy. - Whisk it vigorously.
A few extra minutes of whisking can often smooth out minor clumps.
Thin Gravy? Here’s What to Do
- Thicken it up.
Mix 1 teaspoon of cornstarch with 2 tablespoons of cold water, then whisk it into the gravy and simmer until thickened. - Simmer it longer.
Allowing the gravy to cook down a little more can naturally thicken it and concentrate the flavors.
Too Salty? Balance It Out
- Add a starch.
A small peeled potato simmered in the gravy can absorb excess salt. - Dilute with stock or water.
Adding a splash of liquid can tone down overpowering saltiness.
For more inspiration, check out our Easy 4-Ingredient Potato Soup recipe—another comfort food staple that pairs beautifully with brown gravy.
Serving and Garnishing Your Brown Gravy Homemade
Brown gravy is the perfect finishing touch to elevate a variety of dishes. Let’s get creative with presentation and pairings.
Pair It with the Classics
- Mashed Potatoes:
Drizzle your gravy over a mountain of fluffy mashed potatoes. Add a sprinkle of chopped chives or parsley for a pop of color. - Roast Meats:
Spoon it generously over roast beef, turkey, or pork chops. Pair with roasted vegetables for a complete meal. - Poutine:
Top crispy fries with brown gravy and cheese curds for the ultimate indulgence.
Creative Presentation Ideas
- Gravy Boats for Elegance:
Serve your gravy in a polished gravy boat for a classy touch at dinner parties. - Layered Shepherd’s Pie:
Use the gravy as a base layer in shepherd’s pie or pour it over the mashed potato topping before serving.
Add a Dash of Garnish
- Herbs and Spices:
Fresh thyme, parsley, or even a dash of smoked paprika can give your gravy a sophisticated flair. - Crispy Toppings:
Fried onions or crispy garlic chips add crunch and elevate the texture.
For more cozy dinner ideas, explore our Easy Crockpot Marry Me Chicken recipe—pair it with your homemade gravy for a meal to remember.
Tips for Healthier and Dietary-Friendly Brown Gravy Homemade
Creating a healthier version of brown gravy homemade doesn’t mean sacrificing flavor. With a few ingredient swaps, you can make it suitable for various dietary needs. Whether you’re cutting calories or following a specific diet, these tips have you covered.
Healthier Alternatives and Swaps
- Low-Calorie Options:
- Swap butter for olive oil or a plant-based butter substitute. This reduces saturated fats while keeping the gravy rich.
- Use low-sodium beef or vegetable stock to lower the salt content without compromising flavor.
- Dairy-Free Variations:
- Replace butter with coconut oil for a slightly nutty undertone.
- Use almond or oat milk for a creamy texture if you’re aiming for a white-brown gravy hybrid.
- Gluten-Free Choices:
- Replace all-purpose flour with cornstarch or arrowroot powder.
- For added nutrition, consider using chickpea flour as a thickener—it’s naturally gluten-free and protein-packed.
- Vegan-Friendly Adjustments:
- Choose vegetable stock and add a teaspoon of soy sauce or nutritional yeast for a savory depth.
- Stir in a splash of balsamic vinegar to mimic the umami flavor of pan drippings.
Pairing Beverages for the Perfect Meal
The right drink can enhance your dining experience. For example:
- Red wine pairs beautifully with beef dishes draped in brown gravy, thanks to its robust flavor.
- For a non-alcoholic option, sparkling apple cider complements the richness without overpowering it.
- If you’re serving vegetarian gravy, a light herbal tea like chamomile or mint can balance the flavors effortlessly.
Additionally, for an adventurous pairing, try spiced ginger ale—it offers a refreshing contrast to the gravy’s savory notes.
Storing and Reheating Brown Gravy Homemade
Leftover brown gravy? No problem! Here’s how to keep it fresh and reheat it like a pro.
Storing Tips
- Refrigerator:
Store the gravy in an airtight container for up to 3 days. Let it cool to room temperature before refrigerating. - Freezer:
Pour gravy into a freezer-safe container or ice cube tray for portion control. Freeze for up to 3 months.
Reheating Guidelines
- On the Stove:
- Pour the gravy into a saucepan.
- Heat on low, stirring occasionally to maintain a smooth consistency. Add a splash of stock or water if it’s too thick.
- In the Microwave:
- Transfer gravy to a microwave-safe bowl.
- Heat in 30-second intervals, stirring between each session to avoid hotspots.
- For Frozen Gravy:
- Thaw overnight in the refrigerator, then reheat using the methods above.
For more inspiration on making meals ahead of time, check out our Twice Baked Mashed Potatoes recipe—perfect for pairing with your homemade gravy.
FAQs About Brown Gravy Homemade
Still have questions about making the perfect brown gravy homemade? Let’s tackle some common ones to make your gravy game even stronger.
What Is Gravy Browning Made Of?
Gravy browning is a concentrated liquid made from caramelized sugar, water, and seasonings. It’s used to deepen the color and flavor of gravy, giving it a rich, dark appearance. For example, if your gravy looks too pale, a few drops of gravy browning can quickly fix it. However, it’s not essential for homemade brown gravy, as a well-cooked roux and flavorful stock provide natural richness.
What Can I Use If I Don’t Have Brown Gravy Mix?
No brown gravy mix? No worries! You can easily whip up a batch from scratch with pantry staples. Combine butter, flour, and beef or vegetable stock for a basic gravy. For added depth, use soy sauce or Worcestershire sauce. Consequently, you’ll enjoy a fresh, preservative-free version that tastes far better than store-bought mixes.
What Is the Difference Between Country-Style Gravy and Brown Gravy?
Country-style gravy and brown gravy are both delicious but quite different. Country-style gravy is usually made with milk or cream and is lighter in color and texture. It’s often served with biscuits or fried chicken. On the other hand, brown gravy uses beef or chicken stock and a roux, giving it a savory, rich flavor perfect for roasts or mashed potatoes.
What Is the Secret Ingredient for Good Gravy?
The secret to outstanding gravy lies in balance and depth of flavor. For example, a splash of Worcestershire sauce, soy sauce, or a teaspoon of Dijon mustard can enhance the umami factor. Additionally, using pan drippings from roasted meat gives your gravy a rich, savory punch that’s hard to beat.
Conclusion: Your Journey to the Best Brown Gravy Homemade
From its rich history to its endless variations, brown gravy homemade isn’t just a recipe—it’s a tradition that brings comfort and flavor to your table. By following this guide, you’ve learned how to create a perfect roux, troubleshoot common issues, and even adapt the recipe for different dietary needs.
We hope this article inspires you to try your hand at making your own brown gravy. It’s easier than it looks, and the rewards are oh-so-tasty! Once you’ve mastered the recipe, why not explore other comfort food classics? Check out our Grilled Steak Elote Tacos for another delicious pairing idea.
If you’ve tried the recipe or have your own tips to share, we’d love to hear from you! Leave a comment below and let us know how it turned out. Let’s keep the conversation—and the gravy—flowing!


